
PR この記事には広告(アフィリエイトリンク)が含まれています。 詳細
VSCodeでGradleプロジェクトを動かそう
前回、VSCodeを用いてJavaプロジェクトを動かす方法をご紹介しました。
 関連記事
【グッバイEclipse】VSCodeでJavaの開発環境を構築するための設定方法【import保管やデバッグ確認まで出来ちゃう】
IT
Java
Mac
Windows
アプリケーション
関連記事
【グッバイEclipse】VSCodeでJavaの開発環境を構築するための設定方法【import保管やデバッグ確認まで出来ちゃう】
IT
Java
Mac
Windows
アプリケーション今回は、Gradleプロジェクトを動かすための方法を試してみましたのでご紹介しようと思います。
SpringBootはこちら
VSCodeでSpringBootを動かすための記事もご紹介していますので、合わせて参考にしていただければなと思います。
 関連記事
【グッバイNetBeans】VSCodeでSpringBootの開発環境を構築するための設定方法【ホットリロードやデバッグにも対応】
IT
Java
Mac
Windows
アプリケーション
関連記事
【グッバイNetBeans】VSCodeでSpringBootの開発環境を構築するための設定方法【ホットリロードやデバッグにも対応】
IT
Java
Mac
Windows
アプリケーション手順
Gradleのインストール
まずはgradleプロジェクトを作成するためにgradleをインストールします。
gradleはHomebrewでサクッと落とす事が出来ます。
Updating Homebrew...
==> Auto-updated Homebrew!
Updated 1 tap (homebrew/core).
==> Deleted Formulae
mysql@5.5

==> Downloading https://services.gradle.org/distributions/gradle-5.6.4-all.zip
==> Downloading from https://downloads.gradle-dn.com/distributions/gradle-5.6.4-all.zip
######################################################################## 100.0%
🍺  /usr/local/Cellar/gradle/5.6.4: 14,318 files, 245.3MB, built in 44 seconds
Gradleプロジェクトの作成
次にgradleプロジェクトを作成します。
作業ディレクトリに移動し、以下を実行
Welcome to Gradle 5.6.4!

Here are the highlights of this release:
 - Incremental Groovy compilation
 - Groovy compile avoidance
 - Test fixtures for Java projects
 - Manage plugin versions via settings script

For more details see https://docs.gradle.org/5.6.4/release-notes.html

Starting a Gradle Daemon (subsequent builds will be faster)

Select build script DSL:
  1: Groovy
  2: Kotlin
Enter selection (default: Groovy) [1..2]

Select test framework:
  1: JUnit 4
  2: TestNG
  3: Spock
  4: JUnit Jupiter
Enter selection (default: JUnit 4) [1..4]

Project name (default: simple): sample
Source package (default: sample):

> Task :init
Get more help with your project: https://docs.gradle.org/5.6.4/userguide/tutorial_java_projects.html

BUILD SUCCESSFUL in 55s
2 actionable tasks: 2 executed
何点か対話式で聞かれるのでお好みで。
今回は全てデフォルトで作成しました。
プロジェクト構造
ディレクトリ構造はこんな感じになると思います。
.
├── build.gradle
├── gradle
│   └── wrapper
│       ├── gradle-wrapper.jar
│       └── gradle-wrapper.properties
├── gradlew
├── gradlew.bat
├── settings.gradle
└── src
    ├── main
    │   ├── java
    │   │   └── sample
    │   │       └── App.java
    │   └── resources
    └── test
        ├── java
        │   └── sample
        │       └── AppTest.java
        └── resources

11 directories, 8 files
tasks.jsonの作成
次に、gradleコマンドをVSCode上から実行するための設定ファイルを作りましょう。
{
    "version": "2.0.0",
    "tasks": [
        {
            "label": "Sample Build",
            "type": "shell",
            "command": "./gradlew build"
        },
        {
            "label": "Sample Run",
            "type": "shell",
            "command": "./gradlew run",
            "group": {
                "kind": "build",
                "isDefault": true
            }
        },
        {
            "label": "Sample Clean",
            "type": "shell",
            "command": "./gradlew clean"
        },
        {
            "label": "Sample Check",
            "type": "shell",
            "command": "./gradlew check"
        }
    ]
}
確認
では、実際に実行してみましょう。
Ctrl+Pのショートカットでコマンドパレットを開き、「task 」(※要半角スペース)と入力するとtasks.jsonに指定したタスクが表示されます。
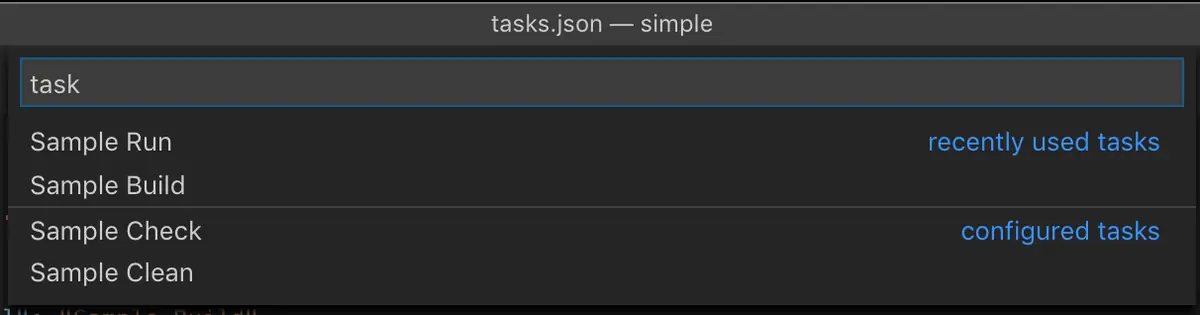
今回はSample Buildタスクを実行してみます。
すると、ターミナル上で実行されます。
> Executing task: ./gradlew run <

Error checking TLS connection: Host is not running

> Task :run
Hello world.

BUILD SUCCESSFUL in 614ms
2 actionable tasks: 1 executed, 1 up-to-date

Terminal will be reused by tasks, press any key to close it.

期待通りの挙動になりましたね♪
依存関係の追加
では、次は適当なライブラリの依存関係を追加してimport補完が効くところまでを確認しましょう。
今回はjavax.validationのvalidation-apiを追加してみようと思います。
/*
 * This file was generated by the Gradle 'init' task.
 *
 * This generated file contains a sample Java project to get you started.
 * For more details take a look at the Java Quickstart chapter in the Gradle
 * User Manual available at https://docs.gradle.org/5.6.4/userguide/tutorial_java_projects.html
 */

plugins {
    // Apply the java plugin to add support for Java
    id 'java'

    // Apply the application plugin to add support for building a CLI application
    id 'application'
}

repositories {
    // Use jcenter for resolving dependencies.
    // You can declare any Maven/Ivy/file repository here.
    jcenter()
}

dependencies {
    // https://mvnrepository.com/artifact/javax.validation/validation-api
    compile group: 'javax.validation', name: 'validation-api', version: '2.0.1.Final' // ★追加


    // This dependency is used by the application.
    implementation 'com.google.guava:guava:28.0-jre'

    // Use JUnit test framework
    testImplementation 'junit:junit:4.12'
}

application {
    // Define the main class for the application
    mainClassName = 'sample.App'
}
この状態でSample Buildタスクを実行してみてください。
しかし、このままではまだimport保管の候補に出ません。
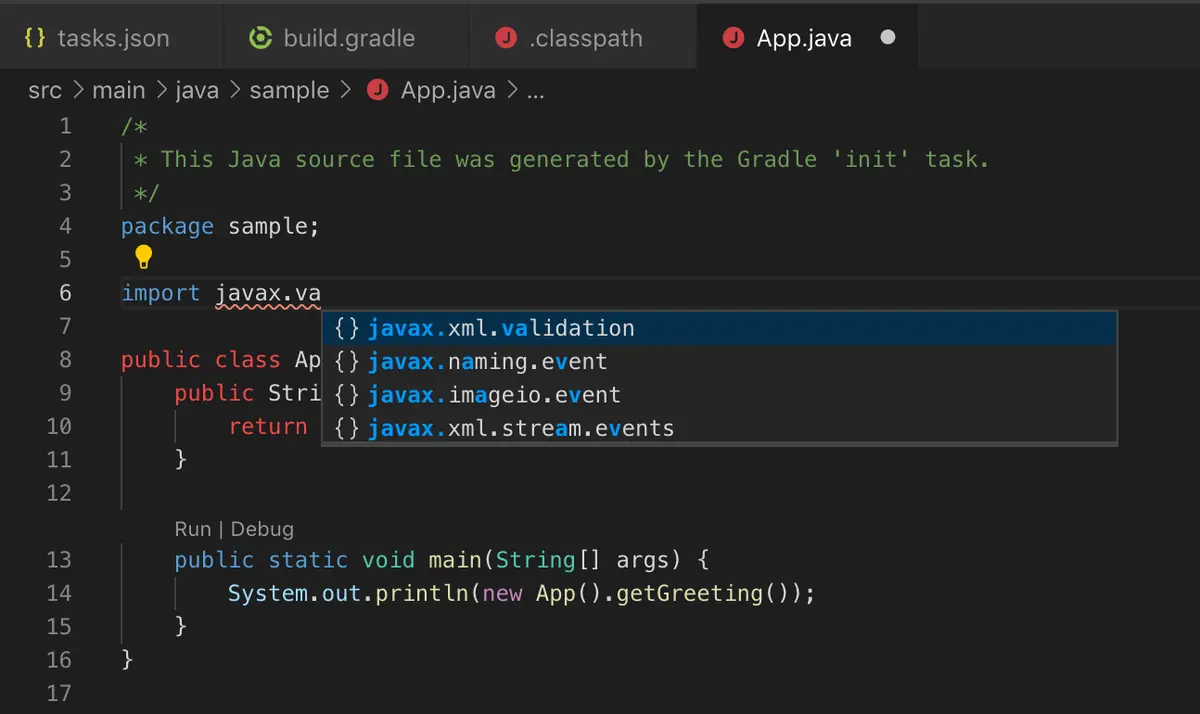
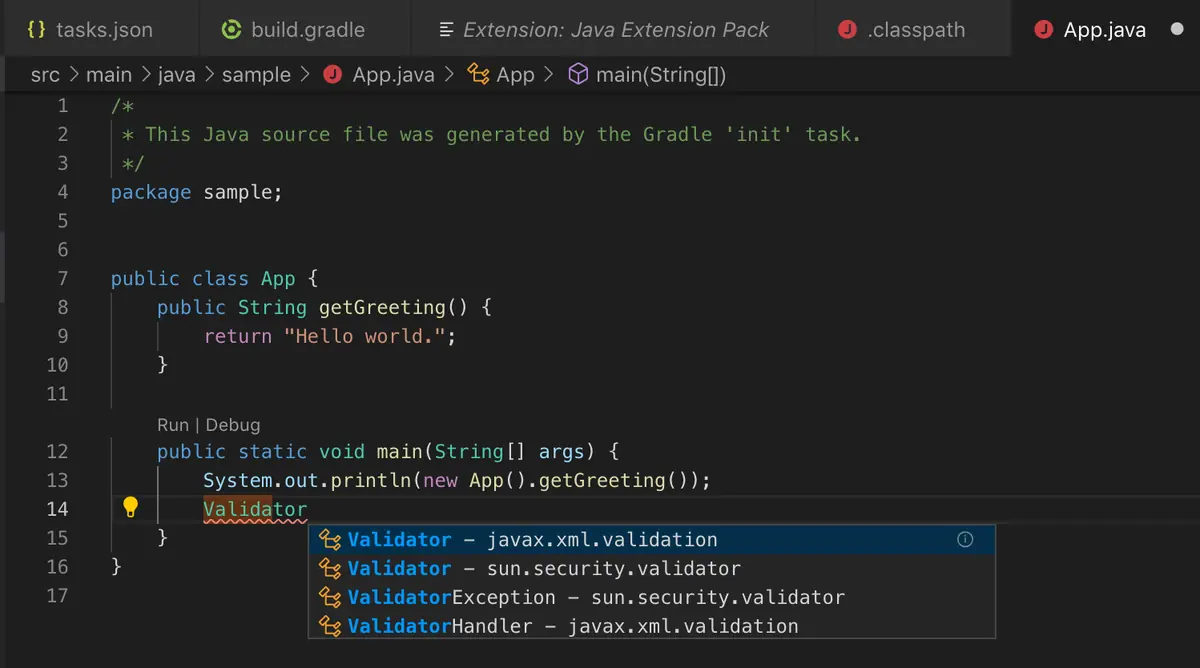
どうやら、VSCodeのjava extension packのimport保管はEclipseと同様に.classpathを読み込むようです。
ということは、Gradleのeclipseタスクを実行して再生成すれば良いのでは!?
今日は頭が冴えています。(?)
早速試しましょう。
/*
 * This file was generated by the Gradle 'init' task.
 *
 * This generated file contains a sample Java project to get you started.
 * For more details take a look at the Java Quickstart chapter in the Gradle
 * User Manual available at https://docs.gradle.org/5.6.4/userguide/tutorial_java_projects.html
 */

plugins {
    // Apply the java plugin to add support for Java
    id 'java'

    // Apply the application plugin to add support for building a CLI application
    id 'application'

    id 'eclipse' // ★追加
}
{
    "version": "2.0.0",
    "tasks": [
        {
            "label": "Sample Build",
            "type": "shell",
            "command": "./gradlew build"
        },
        {
            "label": "Sample Run",
            "type": "shell",
            "command": "./gradlew run",
            "group": {
                "kind": "build",
                "isDefault": true
            }
        },
        {
            "label": "Sample Clean",
            "type": "shell",
            "command": "./gradlew clean"
        },
        {
            "label": "Sample Check",
            "type": "shell",
            "command": "./gradlew check"
        }, // ★以下追加
        {
            "label": "Sample Eclipse",
            "type": "shell",
            "command": "./gradlew eclipse"
        }
    ]
}
確認
Sample Eclipseタスクを実行してみてください。
...
(略)
...
<classpathentry sourcepath="/Users/blogenist/.gradle/caches/modules-2/files-2.1/javax.validation/validation-api/2.0.1.Final/4b714a5167580122e46ead3317ffcdcdbd67c5f0/validation-api-2.0.1.Final-sources.jar" kind="lib" path="/Users/blogenist/.gradle/caches/modules-2/files-2.1/javax.validation/validation-api/2.0.1.Final/cb855558e6271b1b32e716d24cb85c7f583ce09e/validation-api-2.0.1.Final.jar">
	<attributes>
		<attribute name="gradle_used_by_scope" value="main,test"/>
	</attributes>
</classpathentry>
...
(略)
...
正常に.classpathにも追記されました。
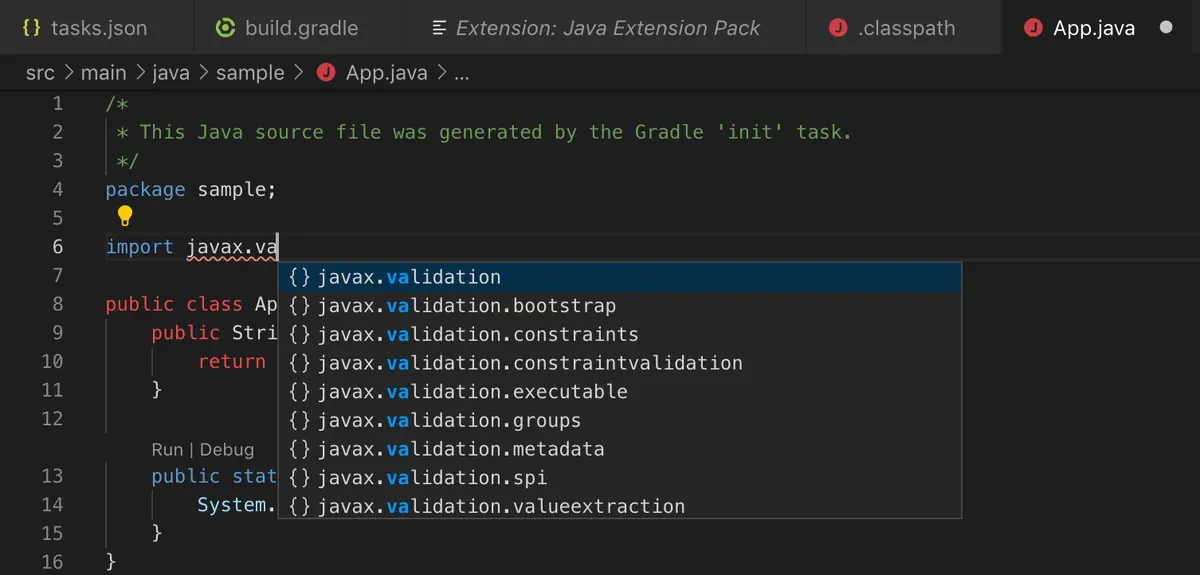
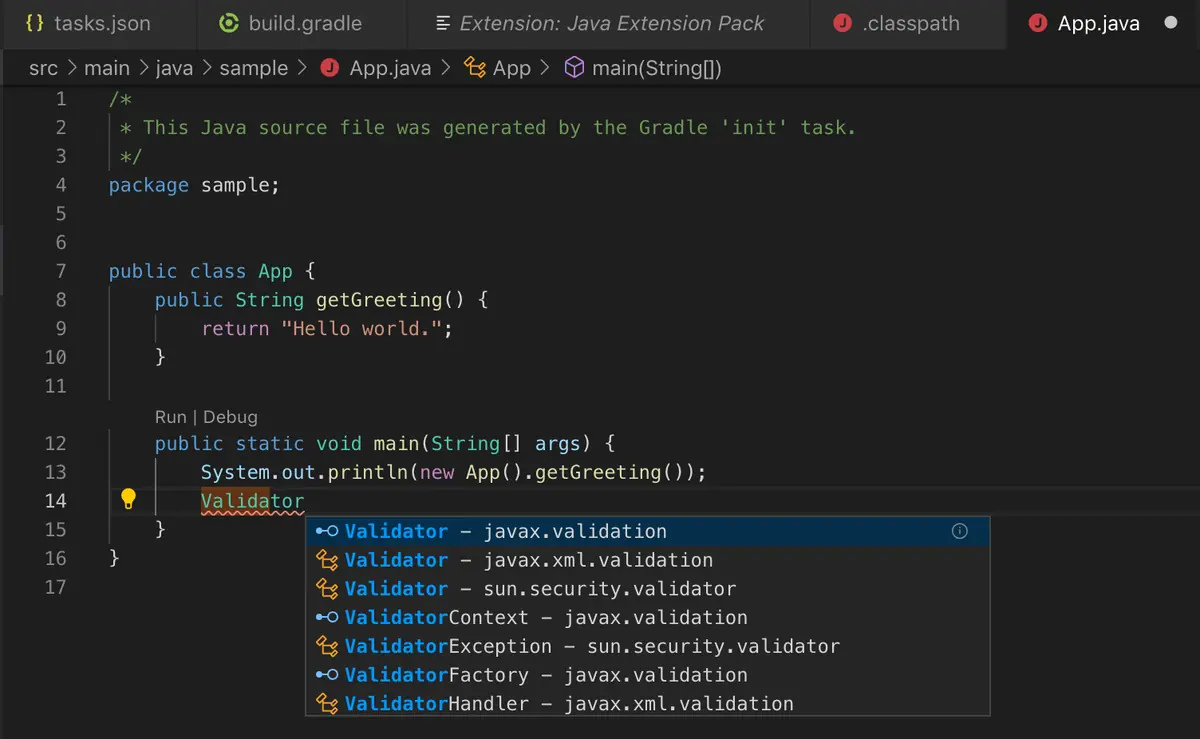
保管も有効になりました!完璧です!
終わりに
以上のように、Gradleで追加したライブラリもVSCode上でimport保管対象に含める事が可能になりました。
.classpathの更新が必要なところに気づかずに困っている方も多いと思いますので、ぜひ参考にしてみてください♪