
PR この記事には広告(アフィリエイトリンク)が含まれています。 詳細
GithubActionsを使ってみよう
CI/CDをGithubで完結
皆さんはGithubActions、使っていますか?
GithubAcrtionsとは、2018年10月にβ版として公開されたGithubの新機能の事を指します。
GitHub Actionsについて GitHub Actionsでは、カスタムソフトウェア開発のライフサイクルにわたるワークフローをGitHubリポジトリに直接作成することができます。GitHub Actionsについて - GitHub ヘルプ
Githubで発生するPushやプルリク、その他諸々の操作をトリガーにアクションと呼ばれる処理を定義する事が出来ます。
これにより、今まではJenkinsやAWS CodeBuildなどを使っていたCI処理をGithub単体で完結出来てしまうという、開発者にとっては気になる機能となっています。
今回は実際にGithubActionsを使って、リポジトリ内のファイルをAWSのS3バケットに転送するワークフローを作ってみようと思います。
2019年9月24日追記:料金について
GithubActionsの料金形態は以下のようになっています。
Simple, pay-as-you-go pricingFeatures • GitHub Actions
要するに、publicリポジトリは誰でもどれだけ使っても無料、privateリポジトリの場合は、アカウント情報によって無料枠の制限(分)と超過分の課金額が異なるよ、とのことです。
なので、GithubActionsでビルド等はせずに成果物だけ管理してデプロイする形にした方がお財布に優しそうですね。
もちろん、場合によりますのでそこはプロジェクト方針に合わせてください。
手順
前提
yarnを使ってbuildを行い、dist配下に出力された成果物をAWSのS3バケットに転送する処理をGithubActionsで実現してみようと思います。
以下の情報は事前に準備してある事とします。
- S3バケット
- 上記バケットにPutする権限を持ったIAM
GithubActionsの利用申請
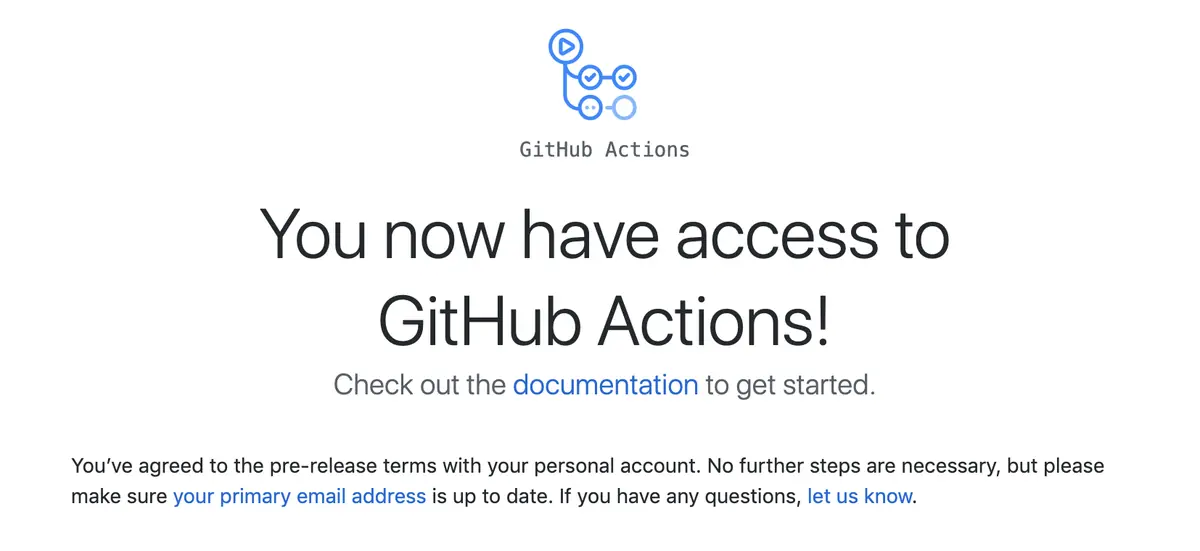
まずはGithubActionsを使わせてもらうように申請をする必要があります。
コチラ のリンクから申請をしましょう。
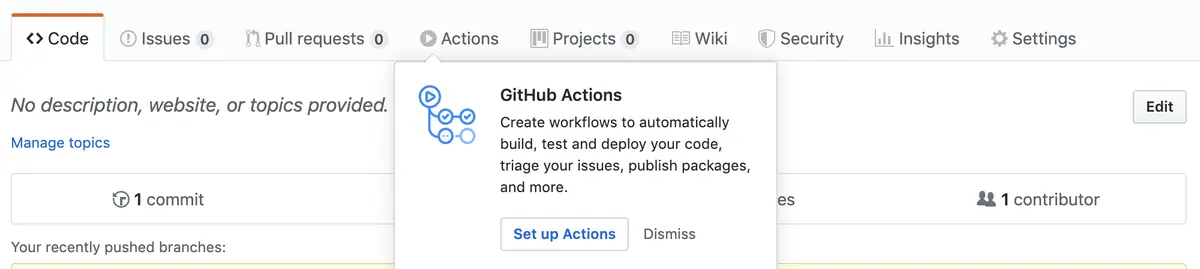
無事申請が完了すると、リポジトリのタブにActionsが追加されると思います。
Hello Worldを出力してみよう
まずはおきまりのHello Worldを出力してみましょう。
Actionsには、様々なテンプレートが用意されているので、一般的な処理なら自分で0から作らなくてもWorkflowが組めます。
とても助かりますよね♪
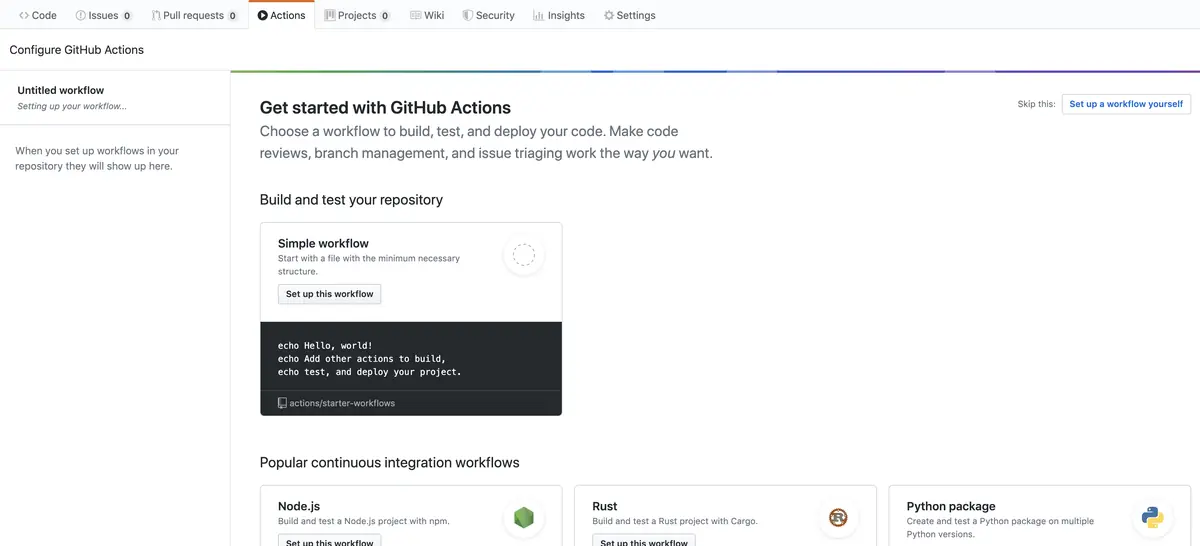
今回は勉強のために0から作るので、右上のSet up a workflow yourselfボタンをクリックしましょう。
すると、エディター画面になると思います。
基本的にはYaml形式での記述になります。
以前まではHCL形式での記述を行っていましたが、2019年9月30日で非推奨となり、Yaml形式に統一されるので注意してください!!!
今回はmasterブランチへのpushをトリガーに標準出力を行うWorkflowを組んでみましょう。
name: CI

on:
  push:
    branches:
    - master

jobs:
  build:

    runs-on: ubuntu-latest

    steps:
    - uses: actions/checkout@v1
    - name: Run a one-line script
      run: echo Hello, world!
こんな感じです。
GithubActionsの記法はかなり細かく用意されています。
公式のドキュメント があるので、そちらをみて頂いた方が理解が進むと思われますので、今回は解説は割愛させていただきます。
記述が終わったら右上のStart commitを行いましょう。
すると、リポジトリに.github/workflow/sample.yamlが追加されていると思います。
確認
それではmasterブランチへpushを行ってみましょう。
すると、正常にActionsが反応してくれると思います。

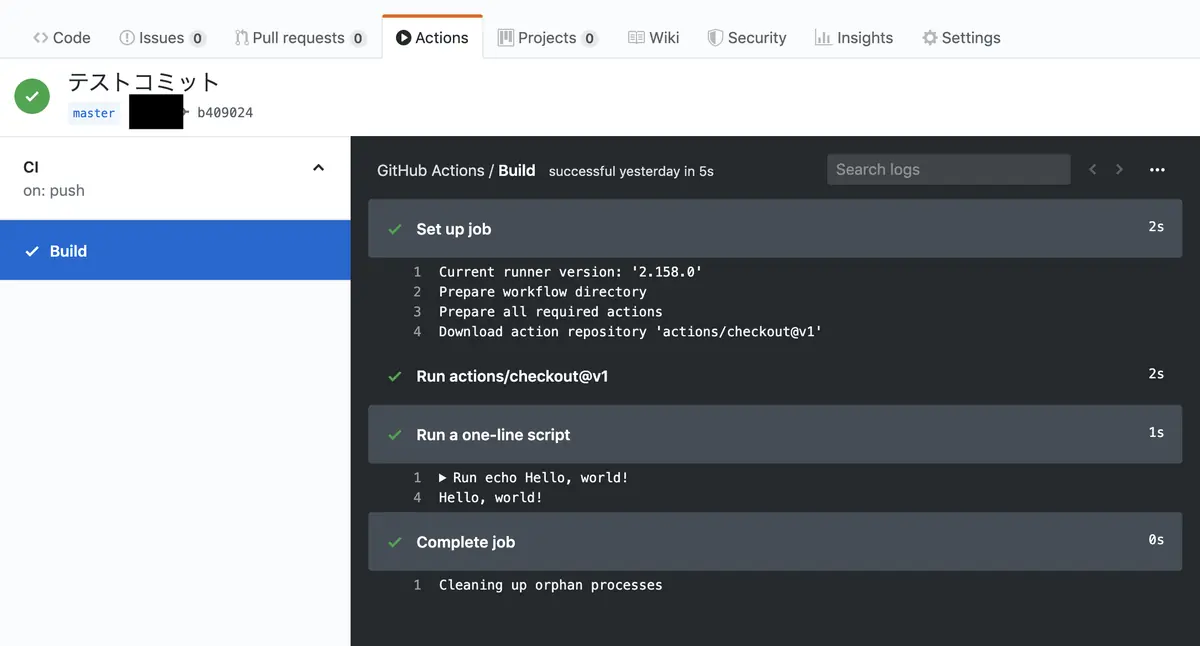
GitHub Actions / Build successful 41 minutes ago in 5s

Set up job 2s
Download action repository 'actions/checkout@v1'
Current runner version: '2.158.0'
Prepare workflow directory
Prepare all required actions
Download action repository 'actions/checkout@v1'
 Run actions/checkout@v1 2s
remote: Counting objects:  16% (12/72)
Run actions/checkout@v1
Added matchers: 'checkout-git'. Problem matchers scan action output for known warning or error strings and report these inline.
##[add-matcher]/home/runner/work/_temp/git_d24bc54c-f8e9-4e99-82d5-c850c5f652e3.json
Syncing repository: blogenist/github-action-sample
git version
git version 2.23.0
git lfs version
git-lfs/2.8.0 (GitHub; linux amd64; go 1.12.6)
git init "/home/runner/work/github-action-sample/github-action-sample"
Initialized empty Git repository in /home/runner/work/github-action-sample/github-action-sample/.git/
git remote add origin https://github.com/blogenist/github-action-sample
git config gc.auto 0
git config --get-all http.https://github.com/blogenist/github-action-sample.extraheader
git config --get-all http.proxy
git -c http.extraheader="AUTHORIZATION: basic ***" fetch --tags --prune --progress --no-recurse-submodules origin +refs/heads/*:refs/remotes/origin/*
remote: Enumerating objects: 72, done.
remote: Counting objects:   1% (1/72)
remote: Counting objects:   2% (2/72)
remote: Counting objects:   4% (3/72)
remote: Counting objects:   5% (4/72)
remote: Counting objects:   6% (5/72)
remote: Counting objects:   8% (6/72)
remote: Counting objects:   9% (7/72)
remote: Counting objects:  11% (8/72)
remote: Counting objects:  12% (9/72)
remote: Counting objects:  13% (10/72)
remote: Counting objects:  15% (11/72)
remote: Counting objects:  16% (12/72)

Run a one-line script 1s
Hello, world!
Run echo Hello, world!
Hello, world!

Complete job 0s
Cleaning up orphan processes
Cleaning up orphan processes
pushをトリガーに正常に処理が実行されましたね♪
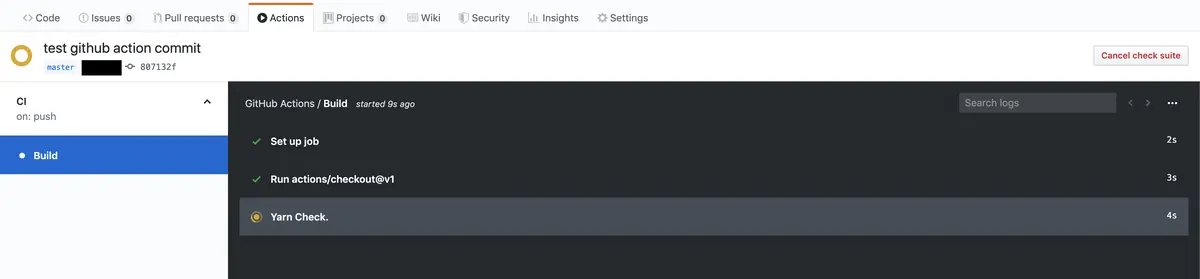
実行中にもリアルタイムで処理を確認する事も出来ます。
失敗した場合
処理の途中で失敗した場合は、こんな感じで処理結果とエラーが出力されます。
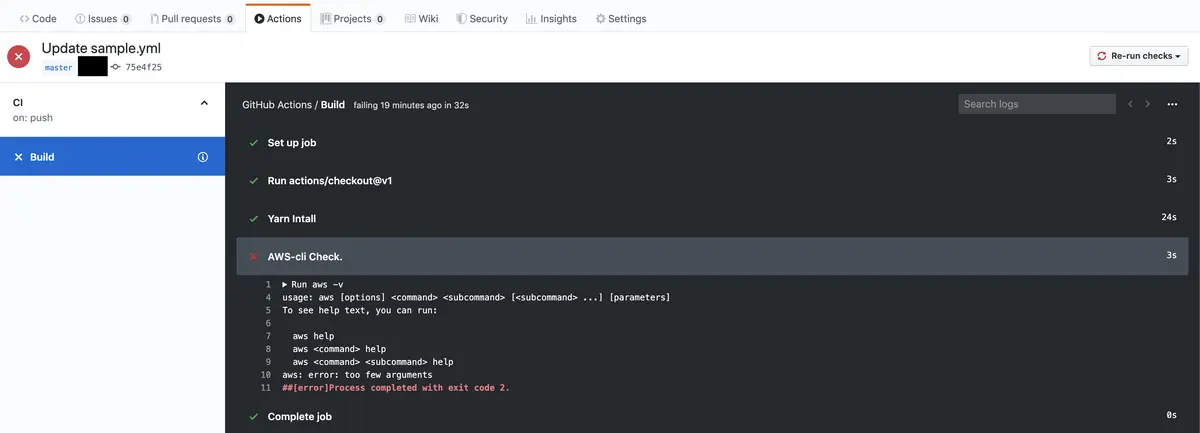
AWS-cli Check.3s
##[error]Process completed with exit code 2.
Run aws -v
usage: aws [options] <command> <subcommand> [<subcommand> ...] [parameters]
To see help text, you can run:

  aws help
  aws <command> help
  aws <command> <subcommand> help
aws: error: too few arguments
##[error]Process completed with exit code 2.
AWS-cliはデフォルトで用意されている
今回使用するAWS-cliは、GihubActionsを実行する環境にて最初からコマンドが使える状態になっているとのことなので、確認してみましょう。
name: CI

on:
  push:
    branches:
    - master

jobs:
  build:

    runs-on: ubuntu-latest

    steps:
    - uses: actions/checkout@v1
    - name: AWS-cli Check.
      run: aws --version
確認
Yarn Intall2s
1.17.3

Run yarn -v
1.17.3
 AWS-cli Check.4s
aws-cli/1.16.221 Python/2.7.15+ Linux/5.0.0-1016-azure botocore/1.12.211
Run aws --version
aws-cli/1.16.221 Python/2.7.15+ Linux/5.0.0-1016-azure botocore/1.12.211
問題なく使えましたね。
準備する必要がないので助かります♪
Secretの登録
今回はAWS-cliに用意しているIAMの認証情報を指定する必要があります。
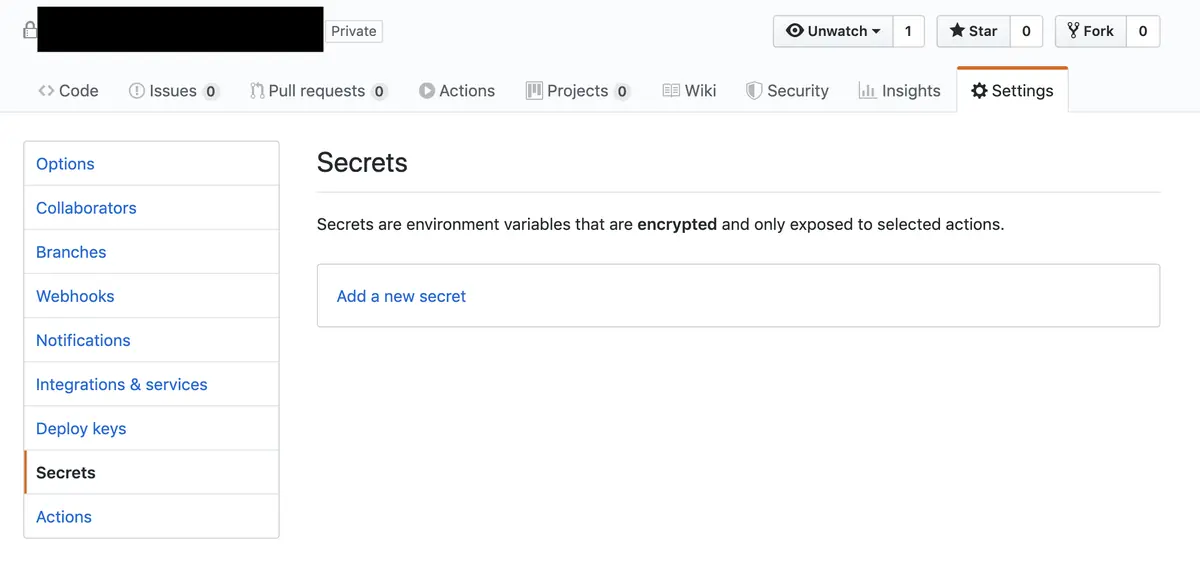
GithubActionsの中で外部サービス等の認証情報を使いたい場合、Workflowの中には定義せずに、GitHubのSecrets機能を使うことになります。
Settings > Secretsに遷移し、情報を登録しましょう。
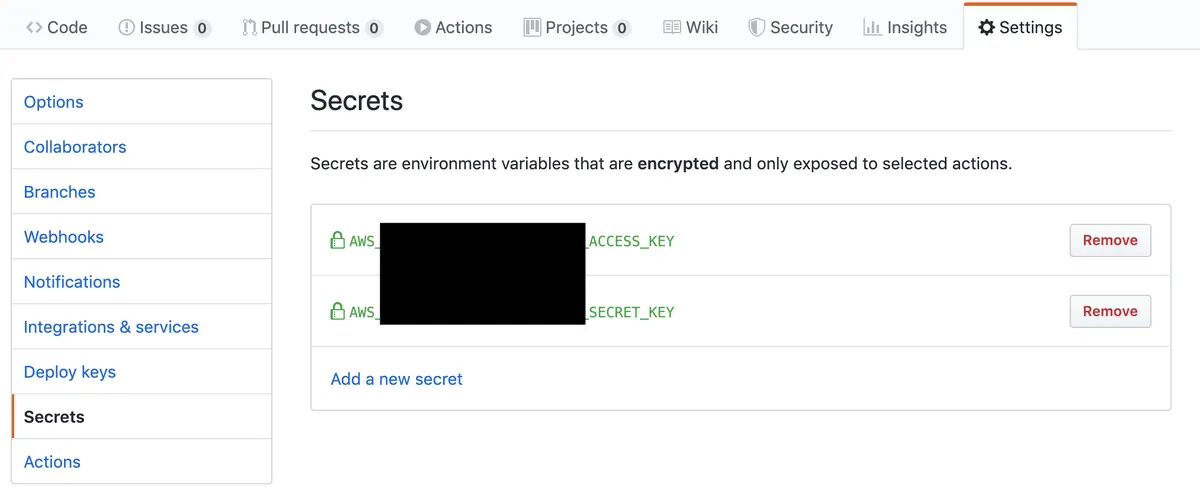
Workflowの中に直接定義すると、Git管理内に認証情報が含まれてしまって危険です。
Secretsを使うことで暗号化した状態で認証情報を管理してもらえるので、セキュリティ的に安全です。
Workflowの定義
では実際にWorkflowを定義していきましょう。
name: CI

on:
  push:
    branches:
    - master

jobs:
  build:

    runs-on: ubuntu-latest

    steps:
    - uses: actions/checkout@v1

    - name: Build
      run: cd home && yarn install && yarn build

    - name: Copy
      env:
        AWS_ACCESS_KEY_ID: ${{ secrets.AWS_S3_PUT_ACCESS_KEY }}
        AWS_SECRET_ACCESS_KEY: ${{ secrets.AWS_S3_PUT_SECRET_KEY }}
      run: aws s3 cp home/dist/ s3://blogenist.sample.bucket/ --recursive
Secretsで定義した変数はsecrets.XXXで取得する事が可能です。
今回はさらに実行環境の環境変数に指定する事でAWS-cliの認証情報として設定しています。
cdに注意
注意すべき点は、stepごとに作業ディレクトリはリセットされてしまうらしく、ディレクトリを移動したい場合はcd && {続けて行いたいコマンド}のように記述する必要がありそうでした。
Step cd 0s
  shell: /bin/bash -e {0}
  Run cd home
  cd home
  shell: /bin/bash -e {0}
Step pwd 0s
  Run pwd
  shell: /bin/bash -e {0}
  pwd
  /home/runner/work/github-action-sample/github-action-sample
Step cd &pwd 0s
  Run cd home &&pwd
  shell: /bin/bash -e {0}
  cd home &&pwd
/home/runner/work/github-action-sample/github-action-sample/home
実行
では、実際に実行してみましょう!
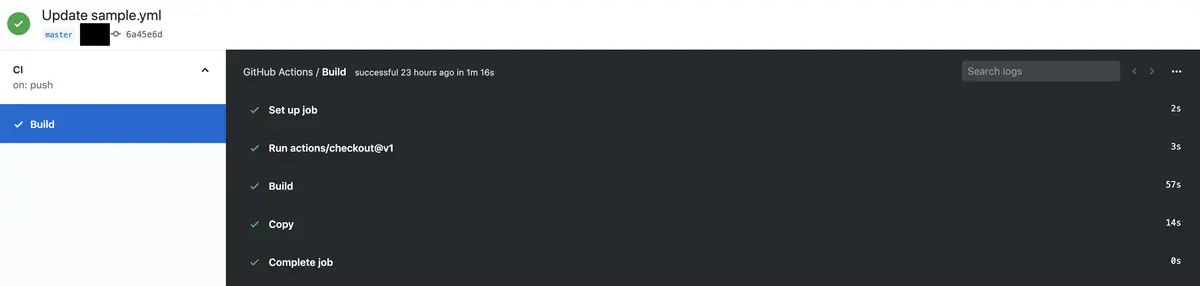
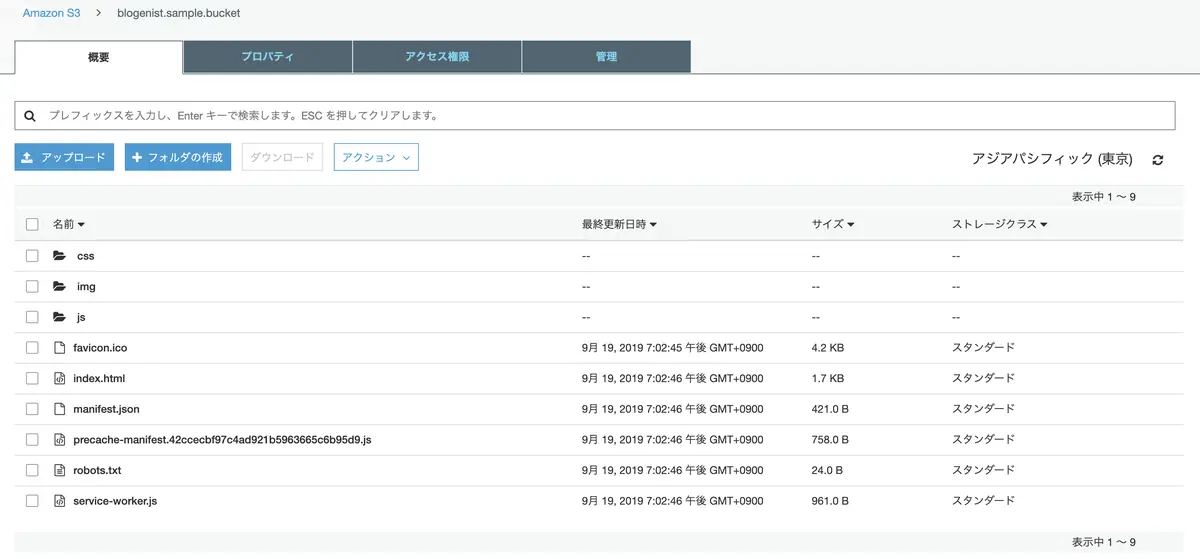
無事に転送出来ました!!
CIツールを用意する事なく簡単に転送出来るのはとても楽チンですね♪
終わりに
以上のように、Githubの強力な新機能をお試しで使ってみました。
Jenkinsで出来る事は基本実現出来そうな気がしているので、皆さんもぜひ試してみてください♪