
PR この記事には広告(アフィリエイトリンク)が含まれています。 詳細
VueアプリでBootstrap4を導入したい
管理システムや簡易なWebサイトを開発する際、そこまでデザインにこだわる必要がなく、とはいえ自分でCSSを作り込む時間をかけたい場合にUIフレームワークを導入することになると思います。
Vueには多くのUIフレームワークがあるのですが、その中でもシンプルで使いやすいのがBootstrap-vueです。
BootstrapVue With BootstrapVue you can build responsive, mobile-first projects on the web using Vue.js and the world's most popular front-end CSS library — Bootstrap v4. BootstrapVue
ちなみに、Vue.jsのUIフレームワークの中でもコンポーネントの数や使いやすさが筆者的に一番高いのはQuasarだと思っているので、気になる方はそちらも参考にしてみてください。
 関連記事
【Vue.jsのUIフレームワーク】Electronアプリのデザインフレームワークに「Quasar」をインストール・導入する方法
IT
Electron
Mac
Node.js
Vue.js
関連記事
【Vue.jsのUIフレームワーク】Electronアプリのデザインフレームワークに「Quasar」をインストール・導入する方法
IT
Electron
Mac
Node.js
Vue.js今回はVue-cliを用いてVueプロジェクトにBootstrap-vueの導入を行う方法をご紹介致します。
手順
Vueプロジェクトを作成
Vue-cli3を使ってVueプロジェクトを作成しましょう。
設定はお好きな形で作っちゃってください。
                                                                                             日  9/22 01:22:09 2019


Vue CLI v3.11.0
? Please pick a preset: Manually select features
? Check the features needed for your project: Babel, TS, PWA, Vuex, CSS Pre-processors, Linter
? Use class-style component syntax? Yes
? Use Babel alongside TypeScript (required for modern mode, auto-detected polyfills, transpiling JSX)? Yes
? Pick a CSS pre-processor (PostCSS, Autoprefixer and CSS Modules are supported by default): Sass/SCSS (with dart-sass)
? Pick a linter / formatter config: TSLint
? Pick additional lint features: (Press <space> to select, <a> to toggle all, <i> to invert selection)Lint on save
? Where do you prefer placing config for Babel, PostCSS, ESLint, etc.? In dedicated config files
? Save this as a preset for future projects? No


Vue CLI v3.11.0
✨  Creating project in /Users/blogenist/sample.
⚙  Installing CLI plugins. This might take a while...

yarn install v1.17.3
info No lockfile found.
[1/4] 🔍  Resolving packages...
[2/4] 🚚  Fetching packages...


success Saved lockfile.
✨  Done in 18.18s.
🚀  Invoking generators...
📦  Installing additional dependencies...

yarn install v1.17.3
[1/4] 🔍  Resolving packages...
[2/4] 🚚  Fetching packages...
[3/4] 🔗  Linking dependencies...
[4/4] 🔨  Building fresh packages...

success Saved lockfile.
✨  Done in 4.05s.
⚓  Running completion hooks...

📄  Generating README.md...

🎉  Successfully created project qrcode.
👉  Get started with the following commands:

 $ cd qrcode
 $ yarn serve
Bootstrap-Vueの導入
次に、vue-cliを使ってプロジェクトにBootstrap-Vueのプラグインを導入します。
📦  Installing vue-cli-plugin-bootstrap-vue...

yarn add v1.17.3
[1/4] 🔍  Resolving packages...
[2/4] 🚚  Fetching packages...
[3/4] 🔗  Linking dependencies...
[4/4] 🔨  Building fresh packages...

success Saved lockfile.
success Saved 1 new dependency.
info Direct dependencies
└─ vue-cli-plugin-bootstrap-vue@0.4.0
info All dependencies
└─ vue-cli-plugin-bootstrap-vue@0.4.0
✨  Done in 2.73s.
✔  Successfully installed plugin: vue-cli-plugin-bootstrap-vue

? Use babel/polyfill? Yes

🚀  Invoking generator for vue-cli-plugin-bootstrap-vue...
📦  Installing additional dependencies...

yarn install v1.17.3
[1/4] 🔍  Resolving packages...
[2/4] 🚚  Fetching packages...
[3/4] 🔗  Linking dependencies...

success Saved lockfile.
✨  Done in 9.56s.
⚓  Running completion hooks...

✔  Successfully invoked generator for plugin: vue-cli-plugin-bootstrap-vue
これだけで導入作業は完了です。
例のごとく、設定周りはVue-cliが自動で更新してくれているので、gitの差分が出ているはずなので確認してみてください。
コアなファイルを例にあげるとにするとこのようにuseの指定が追加されています。
import Vue from 'vue'

import BootstrapVue from 'bootstrap-vue'
import 'bootstrap/dist/css/bootstrap.min.css'
import 'bootstrap-vue/dist/bootstrap-vue.css'

Vue.use(BootstrapVue)
確認
では、実際にBootstrap-Vueのコンポーネントを使ってみましょう。
今回は公式ドキュメントのカードをそのままコピペしてみます。
<template>
  <div id="app">
    <img alt="Vue logo" src="./assets/logo.png">
    <b-container class="bv-example-row">
      <b-row>
        <b-col>
          <b-card title="Card Title" img-src="https://picsum.photos/600/300/?image=25" img-alt="Image" img-top tag="article" style="max-width: 20rem;" class="mb-2">
            <b-card-text>
              Some quick example text to build on the card title and make up the bulk of the card's content.
            </b-card-text>
            <b-button href="#" variant="primary">Go somewhere</b-button>
          </b-card>
        </b-col>
        <b-col>
          <b-card title="Card Title" img-src="https://picsum.photos/600/300/?image=25" img-alt="Image" img-top tag="article" style="max-width: 20rem;" class="mb-2">
            <b-card-text>
              Some quick example text to build on the card title and make up the bulk of the card's content.
            </b-card-text>
            <b-button href="#" variant="primary">Go somewhere</b-button>
          </b-card>
        </b-col>
        <b-col>
          <b-card title="Card Title" img-src="https://picsum.photos/600/300/?image=25" img-alt="Image" img-top tag="article" style="max-width: 20rem;" class="mb-2">
            <b-card-text>
              Some quick example text to build on the card title and make up the bulk of the card's content.
            </b-card-text>
            <b-button href="#" variant="primary">Go somewhere</b-button>
          </b-card>
        </b-col>
      </b-row>
    </b-container>
  </div>
</template>
<script lang="ts">
  import {
    Component,
    Vue
  } from 'vue-property-decorator';
  import HelloWorld from './components/HelloWorld.vue';
  @Component({
    components: {
      HelloWorld,
    },
  })
  export default class App extends Vue {}
</script>
<style lang="scss">
  #app {
    font-family: 'Avenir', Helvetica, Arial, sans-serif;
    -webkit-font-smoothing: antialiased;
    -moz-osx-font-smoothing: grayscale;
    text-align: center;
    color: #2c3e50;
    margin-top: 60px;
  }
</style>
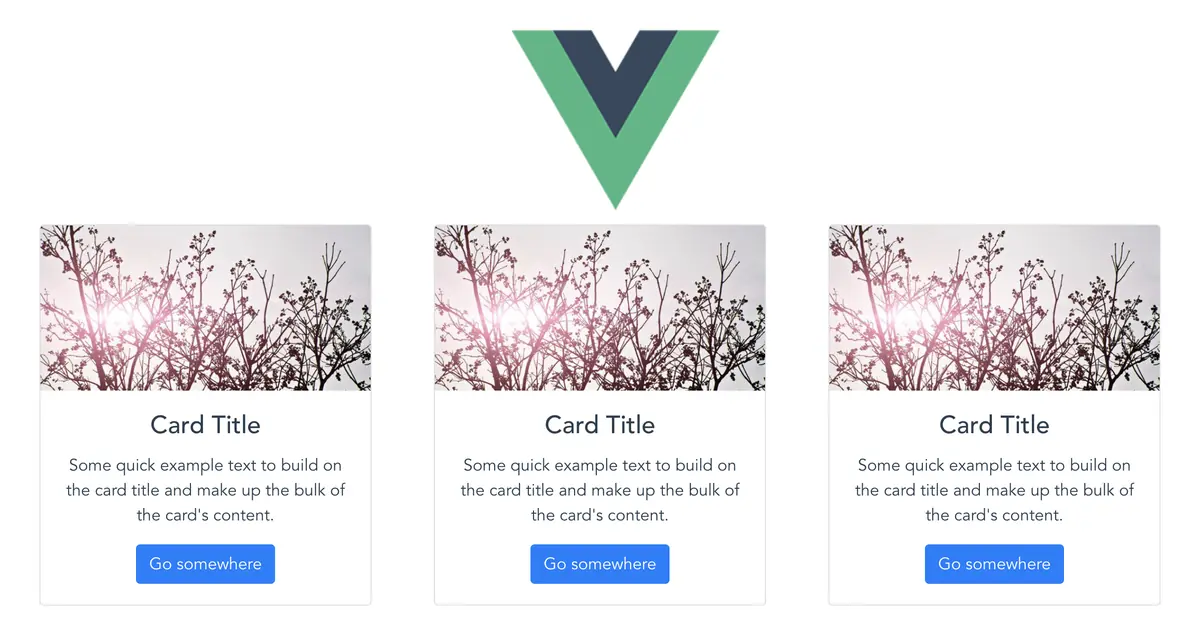
無事にコンポーネントが使えるようになっていますね♪
終わりに
以上のように簡単にVueプロジェクトにBootstrap4を導入する事が出来ました。
Bootstrapは有名なUIフレームワークなので、Vue.jsと組み合わせたいという要望も多いと思うので、そんな時はこちらのやり方を試してみてください♪